macOS 使用 GPG 加解密文件

GPG(GNU Privacy Guard)是一种用于数据加密和签名的开源软件,支持非对称加密和对称加密。在需要将一些敏感文件上传到网盘的场景时,可以在本地使用非对称加密将文件加密后上传。

macOS 安装 GPG

使用 brew 安装 GPG

1
brew install gpg

安装后使用 gpg --version 检查 GPG 版本

1
2
3
4
5
6
7
8
9
10
11
12
13
14
15
❯ gpg --version
gpg (GnuPG) 2.4.5
libgcrypt 1.10.3
Copyright (C) 2024 g10 Code GmbH
License GNU GPL-3.0-or-later <https://gnu.org/licenses/gpl.html>
This is free software: you are free to change and redistribute it.
There is NO WARRANTY, to the extent permitted by law.

Home: /Users/yourname/.gnupg
Supported algorithms:
Pubkey: RSA, ELG, DSA, ECDH, ECDSA, EDDSA
Cipher: IDEA, 3DES, CAST5, BLOWFISH, AES, AES192, AES256, TWOFISH,
CAMELLIA128, CAMELLIA192, CAMELLIA256
Hash: SHA1, RIPEMD160, SHA256, SHA384, SHA512, SHA224
Compression: Uncompressed, ZIP, ZLIB, BZIP2

生成一对新的公私钥

非对称加密需要依赖密钥进行数据的加解密,一般情况下使用公钥加密文件,使用私钥解密文件,因为公钥是公开的,可以发送给任何人,私钥是私有的。

使用 gpg --full-generate-key 生成一对新的公私钥:

1
2
3
4
5
6
7
8
9
10
11
12
13
14
15
16
17
18
19
20
21
22
23
24
25
26
27
28
29
30
31
32
33
34
35
36
37
38
❯ gpg --full-generate-key
gpg (GnuPG) 2.4.5; Copyright (C) 2024 g10 Code GmbH
This is free software: you are free to change and redistribute it.
There is NO WARRANTY, to the extent permitted by law.

Please select what kind of key you want:
(1) RSA and RSA
(2) DSA and Elgamal
(3) DSA (sign only)
(4) RSA (sign only)
(9) ECC (sign and encrypt) *default*
(10) ECC (sign only)
(14) Existing key from card
Your selection? # 加密方式,选择默认的 ECC 即可
Please select which elliptic curve you want:
(1) Curve 25519 *default*
(4) NIST P-384
(6) Brainpool P-256
Your selection? # 椭圆曲线,默认即可
Please specify how long the key should be valid.
0 = key does not expire
<n> = key expires in n days
<n>w = key expires in n weeks
<n>m = key expires in n months
<n>y = key expires in n years
Key is valid for? (0) # 密钥有效期,选择 0,永不过期
Key does not expire at all
Is this correct? (y/N) y

GnuPG needs to construct a user ID to identify your key.

Real name: cui # 名称
Email address: admin@cui.cc # 邮箱地址,加密文件时需要指定这个邮箱地址
Comment: macbook # 备注
You selected this USER-ID:
"cui (macbook) <admin@cui.cc>"

Change (N)ame, (C)omment, (E)mail or (O)kay/(Q)uit? O

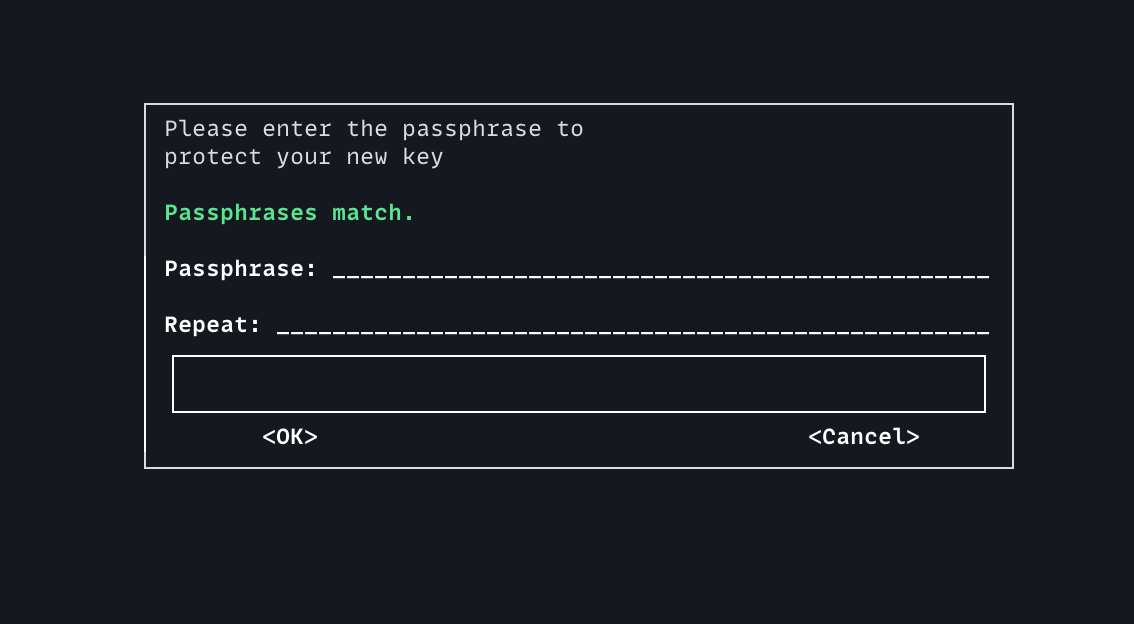
提示输入私钥密码,建议使用包含大小写字母、数字和特殊符号的组合密码,长度不少于 8 位。

随后提示生成密钥成功:

1
2
3
4
5
6
7
8
gpg: directory '/Users/yourname/.gnupg/openpgp-revocs.d' created
gpg: revocation certificate stored as '/Users/yourname/.gnupg/openpgp-revocs.d/B7A537251A427A4829CA1842CB8EC26394392290.rev'
public and secret key created and signed.

pub ed25519 2024-09-29 [SC]
B7A537251A427A4829CA1842CB8EC26394392290
uid cui (macbook) <admin@cui.cc>
sub cv25519 2024-09-29 [E]

其中 B7A537251A427A4829CA1842CB8EC26394392290 是密钥的 ID.

检查本机密钥

使用 gpg --list-keys 列出 GPG 的公钥:

1
2
3
4
5
6
7
❯ gpg --list-keys
[keyboxd]
---------
pub ed25519 2024-09-29 [SC]
B7A537251A427A4829CA1842CB8EC26394392290
uid [ultimate] cui (macbook) <admin@cui.cc>
sub cv25519 2024-09-29 [E]

使用 gpg --list-secret-keys 列出 GPG 的私钥:

1
2
3
4
5
6
7
❯ gpg --list-secret-keys
[keyboxd]
---------
sec ed25519 2024-09-29 [SC]
B7A537251A427A4829CA1842CB8EC26394392290
uid [ultimate] cui (macbook) <admin@cui.cc>
ssb cv25519 2024-09-29 [E]

可以看到公钥和私钥的 ID 是相同的,和刚刚生成的一样。

加密文件

有了密钥之后就可以使用 GPG 加密文件了。加密时需要指定用哪个用户(就是前面提到的 email)的公钥加密。

GPG 加密命令:

1
gpg -o file.gpg -e -r user@example.com file
  • -o file.gpg 指定加密后的文件输出路径,一般用法是在原文件名称的基础上增加 .gpg 后缀。
  • -e--encrypt 的缩写,表示使用加密模式。
  • -r--recipient 的缩写,表示使用哪个用户的公钥加密,填写邮箱地址。
  • file 是要加密的文件路径。

a.txt 文件为例,原文内容:

1
hello

加密命令:

1
gpg -o a.txt.gpg -e -r admin@cui.cc a.txt

因为我本机只有自己的公钥,所以这里指定了自己的邮箱地址。

使用 hexyl 工具查看加密前和加密后的文件,没有此命令的可以使用 brew install hexyl 安装。

1
2
3
4
5
6
7
8
9
10
11
12
13
14
15
16
17
18
19
20
21
22
# 加密前数据
❯ hexyl a.txt
┌────────┬─────────────────────────┬─────────────────────────┬────────┬────────┐
│00000000│ 68 65 6c 6c 6f 0a ┊ │hello_ ┊ │
└────────┴─────────────────────────┴─────────────────────────┴────────┴────────┘

# 加密后数据
❯ hexyl a.txt.gpg
┌────────┬─────────────────────────┬─────────────────────────┬────────┬────────┐
│00000000│ 84 5e 03 88 37 c4 c6 27 ┊ bc 5f 9d 12 01 07 40 90 │×^•×7××'┊×_ו••@×│
│00000010│ 87 72 4e fb 68 e9 34 54 ┊ 4e e8 3f 42 f5 84 f5 a6 │×rN×h×4T┊N×?B××××│
│00000020│ ee 73 59 16 c5 d8 fc 34 ┊ f8 21 f2 ad 97 3c 24 30 │×sY•×××4┊×!×××<$0│
│00000030│ e2 79 61 04 c5 2f ba 9f ┊ 3f b6 95 91 ed 7a ff f3 │×ya•×/××┊?××××z××│
│00000040│ 55 da cb 25 0c 68 26 80 ┊ b6 42 82 5b 03 da ff 36 │U××%_h&×┊×B×[•××6│
│00000050│ df 87 ee 9b 54 5b 5b bf ┊ 70 45 82 8c e4 46 b0 e4 │××××T[[×┊pE×××F××│
│00000060│ d4 50 01 09 02 10 b2 b9 ┊ 83 ed c4 21 e7 f8 d8 a5 │×P•_••××┊×××!××××│
│00000070│ 62 b1 66 3d 98 26 42 f7 ┊ c4 94 d0 22 b1 11 50 1b │b×f=×&B×┊×××"וP•│
│00000080│ 64 12 51 4f f2 34 ba 09 ┊ ad 95 3b dd 2a 5d 4a 48 │d•QO×4×_┊××;×*]JH│
│00000090│ 26 4f ad f7 c2 19 c5 b6 ┊ 41 e3 ce ec f5 b1 26 97 │&O××ו××┊A×××××&×│
│000000a0│ e6 00 64 be 3e 41 da b6 ┊ 12 58 6b 6c 4e 84 bb 28 │×⋄d×>A××┊•XklN××(│
│000000b0│ ee 83 ┊ │×× ┊ │
└────────┴─────────────────────────┴─────────────────────────┴────────┴────────┘

解密文件

GPG 解密文件命令:

1
gpg -o file -d file.gpg
  • -o file 指定解密后的文件输出路径。
  • -d--decrypt 的缩写,表示使用解密模式。
  • file.gpg 是要解密的文件路径。

删除密钥

当确定不需要使用某个密钥时,可以将密钥删除,删除密钥分为删除私钥和删除公钥两个步骤。

删除公钥之前需要执行 gpg --list-keys 获取公钥 ID,可以使用完整的公钥 ID 或者取 ID 的后 8 位。

1
gpg --delete-key <公钥 ID>

删除私钥之前需要执行 gpg --list-secret-keys 获取私钥 ID,可以使用完整的私钥 ID 或者取 ID 的后 8 位。

1
gpg --delete-secret-key <私钥 ID>

删除公钥时提示:

1
2
gpg: there is a secret key for public key "B7A537251A427A4829CA1842CB8EC26394392290"!
gpg: use option "--delete-secret-keys" to delete it first.

说明此公钥 ID 对应了一个私钥,需要先删除私钥才能删除公钥。

删除私钥务必小心,只有在确定无用的情况下才能删除,否则不能解密文件。

导出密钥

导出密钥分为导出公钥和导出私钥。

导出公钥,将公钥写入到 pub.key 文件:

1
gpg -o pub.key --export --armor <公钥 ID>

或使用输出重定向,省略 -o 参数:

1
gpg --export --armor <公钥 ID> > pub.key

导出私钥,将私钥写入到 private.key 文件:

1
gpg -o private.key --export-secret-keys --armor <私钥 ID>

或使用输出重定向,省略 -o 参数:

1
gpg --export-secret-keys --armor <私钥 ID> > private.key

导出私钥需要输入私钥密码。妥善保管导出的私钥文件。

参数说明:

  • --armor 选项会将导出的密钥转换为 ASCII 格式(文本格式)

导入密钥

导入密钥分为导入公钥和导入私钥,无论是导入公钥还是导入私钥,命令都是一样的。

1
gpg --import keyfile

macOS 使用 GPG 加解密文件
https://cui.cc/macos-gpg/
作者
南山崔崔
发布于
2024年9月29日
许可协议